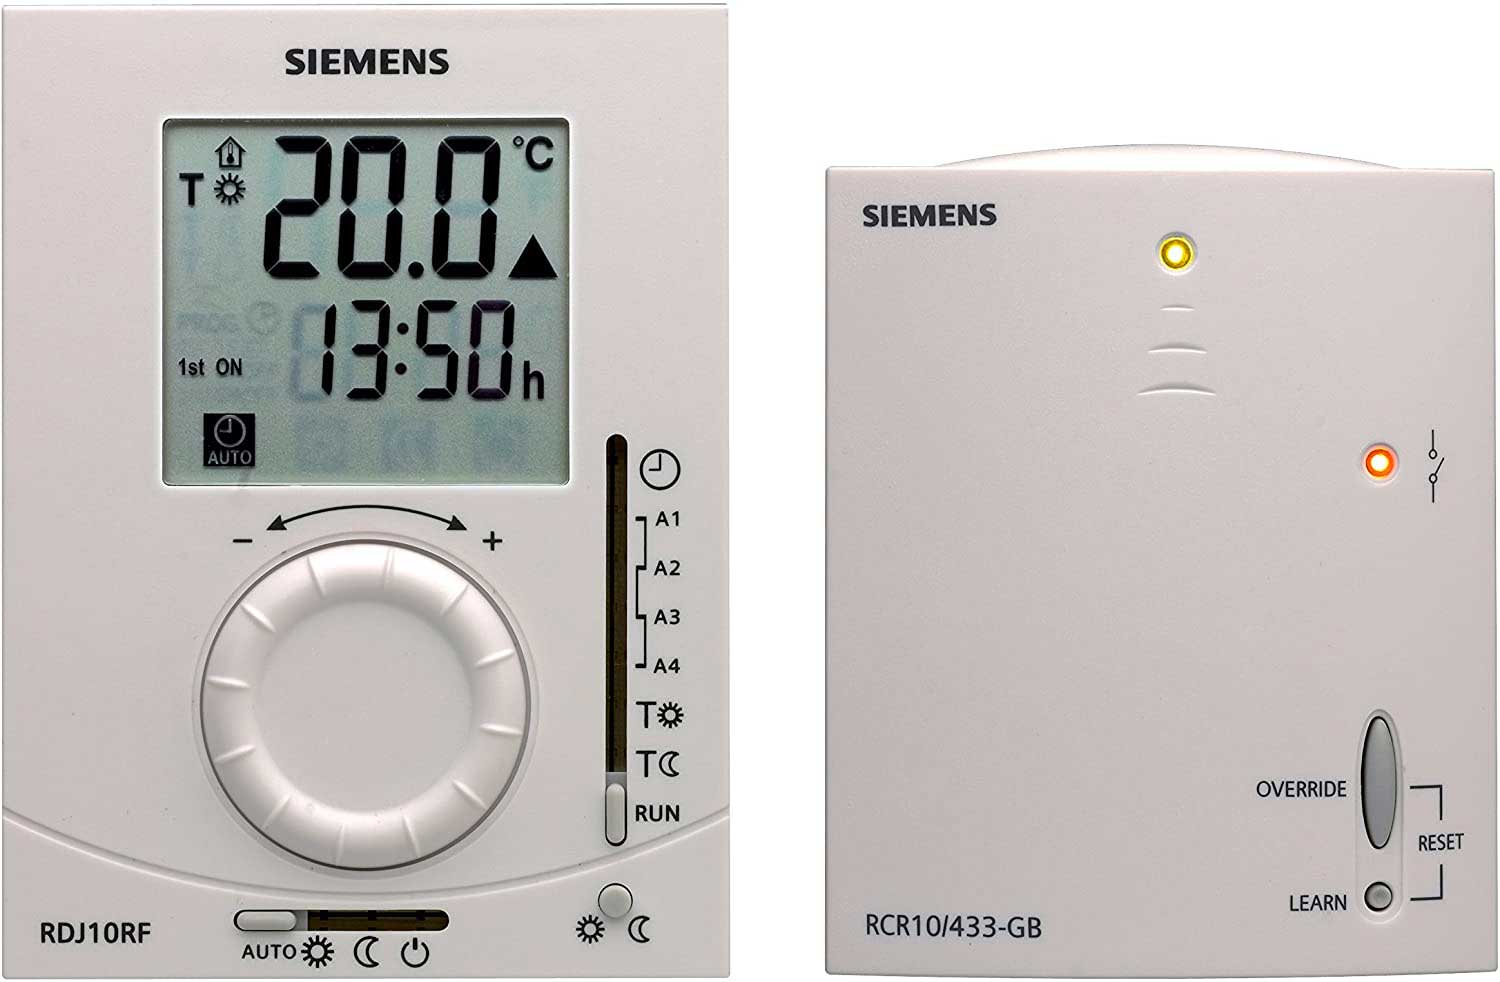
SIEMENS / BOSS THERMOSTAT

- Is the battery symbol displayed on the thermostat or is the screen blank?
YES = Change the batteries in the thermostat allowing upto 10 minutes before putting new ones in. - Is there a red light on the recieving unit (located on the wall near the boiler)
YES = This means it has lost connection with the boiler, please change the batteries as described above then follow the "resync guide" below - Is there a green light on the recieving unit
YES = The thermostat is connected to the boiler and awaiting demand for heating.
Check times and temperature you have set. (See below)
QUICK TEST
Set the TSUN to 23 Degrees
Set the TMOON to 8 degrees
Set the sliders to the sun and run options, then increase the temperature to higher than the current room temperature.
This should put the heating on constant.
Set the TSUN to 23 Degrees
Set the TMOON to 8 degrees
Set the sliders to the sun and run options, then increase the temperature to higher than the current room temperature.
This should put the heating on constant.
HOW TO RESYNC
Step 1
Make sure the thermostat unit has its vertical switch set to 'run' and the horizontal switch set to 'auto'
Step 2
Loosen the screw holding the thermostat to the wall, this screw is situated underneath the thermostat and then take the thermostat to the boiler.
Step 3
On the wall unit/recieving unit next to your boiler there are two buttons 'Set' and 'Reset'. Press and hold the 'Reset' button for 4 seconds until orange light starts to flash.
Step 4
Then press the 'Set' button on the same unit (the light should flash again).
Step 5
Press the 'Learn' button on the back of the thermostat unit, try to be a good metre away from the wall unit/boiler. The lights should flash and then turn green.
Step 6
Press the 'Test' button on the back of the thermostat. This then sends a test signal to the boiler. The green light should come on again. When this has happenend press the 'Test' button again to switch off the test signal. This should now work.
Step 7
All the lights at this point will go off but bear with it a moment for a green light to appear which will then mean they are re-connected.
TIMES AND TEMPERATURES
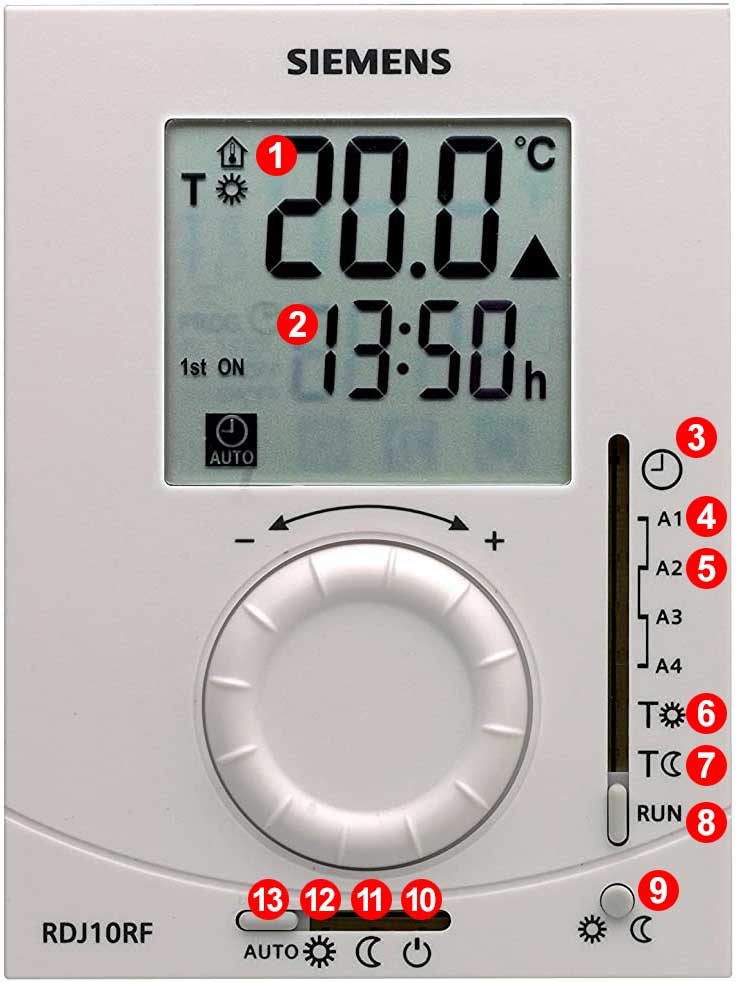
The RDJ is a Programmable Room Thermostat that switch at set times between ON and OFF temperatures

The large number shows the actual temperature
Real time
Move slider to this position to set the clock then turn dial left to decrease the time or right to increase the time
Move slider to this position to set the first ON then turn dial left to decrease time or right to increase time
Move slider to this position to set the first OFF then turn dial left to decrease time or right to increase time
Repeat for A3 ON and A4 OFF
Repeat for A3 ON and A4 OFF
Move slider to this position to set the temperature you want when the thermostat is ON turn dial left to decrease temperature or right to increase temperature
Move the slider to this position to set the temperature you want when the thermostat is OFF (SET BACK) turn dial left to decrease temperature or right to increase temperature usually set @5c
Move the slider to this position when you have finished all your programming
Press this button to switch between ON (Comfort) and OFF (SET BACK)
Move the slider to this position for frost protection only standby.
Move the slider to this position for permanently OFF (SET BACK)
Move the slider to this position for permanently ON (Comfort)
Move the slider to this position for Automatic switching


